

Create an agent
Start a new agent, give it a name and a voice for your brand, and teach it your content.
Your agent is the first conversation many buyers have with your company, so it needs to know your business and speak for your brand from the first message. Creating one takes a few minutes: describe your company, give the agent an identity, and point it at your content.
This article takes you from a blank draft to an agent that can answer questions about your business. A new agent starts as a draft that only you can see.
What do you need before you start?
- A short description of your company: what you do, who you serve, and what makes you different.
- The web address of the pages the agent should learn from, or a PDF such as a product overview.
How do you create an agent?
Start a new agent
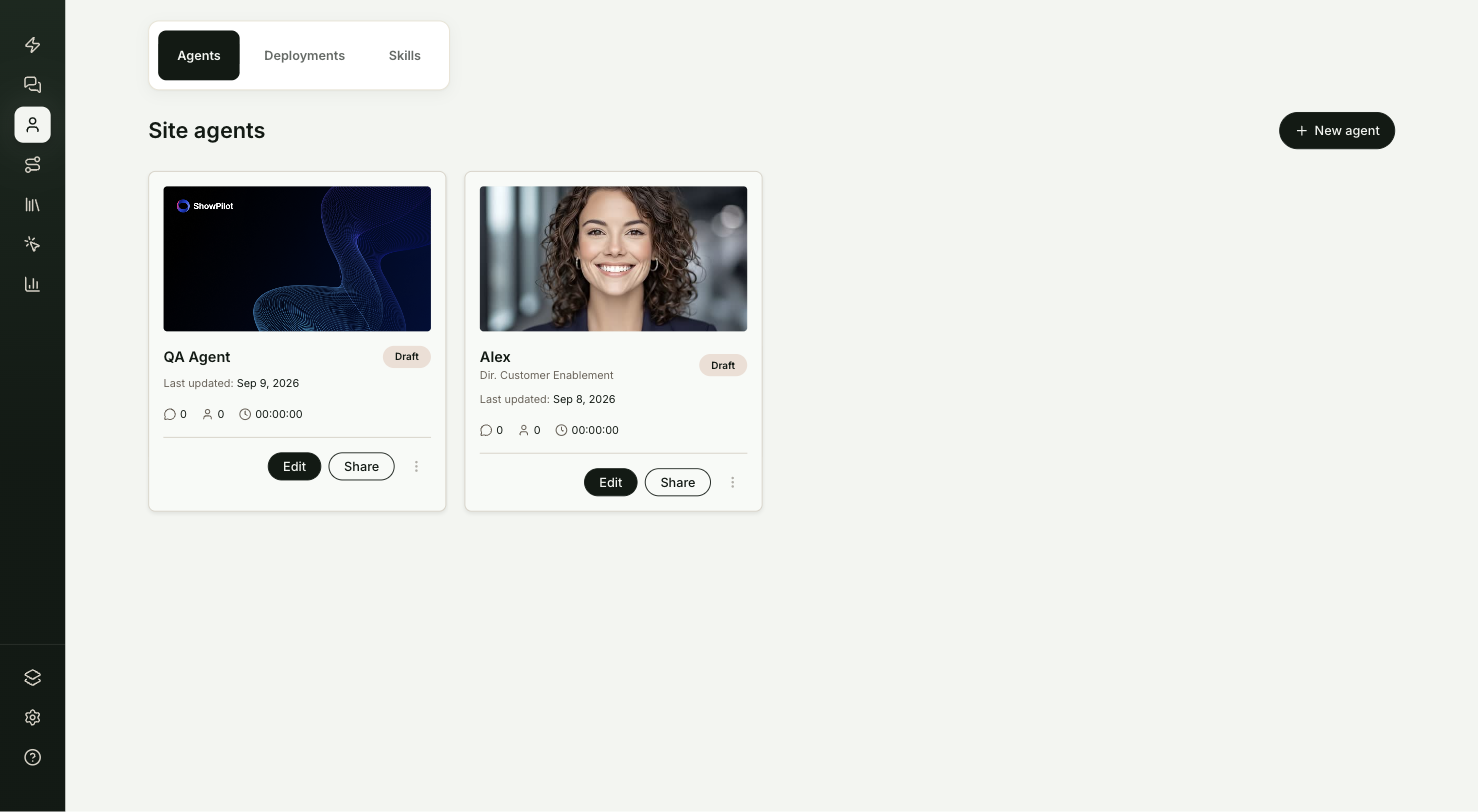
Go to Agents and select New agent. ShowPilot creates a draft called Untitled agent and opens it in the agent editor on the Persona tab.
Describe your brand
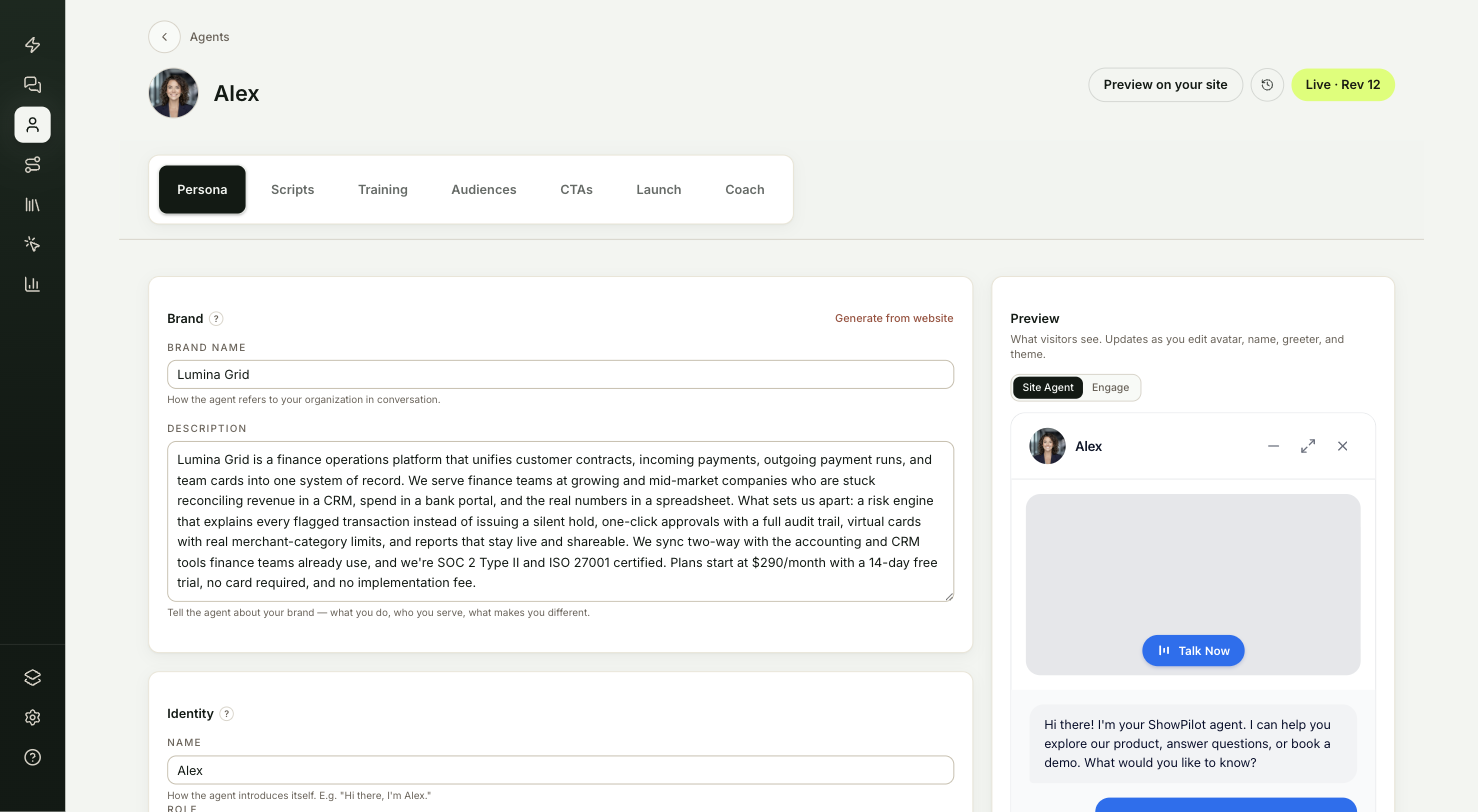
In the Brand card, fill in Brand name and Description. The description is what the agent knows about your company before it reads anything else, so two or three plain sentences work best.
Fields save when you click away from them.
Name the agent
In the Identity card, enter a Name, which is how the agent introduces itself. Role appears beside the name in the chat header. If you leave it blank, visitors see "AI Agent".
Select Choose image to pick or upload a square photo for the agent's avatar.
Pick a tone and write the greeting
Under Tone, pick Casual, Friendly or Professional.
Under Greeting, write the first message every visitor sees when the agent opens. If you leave it empty, visitors get a blank first message.
The Preview card on the right updates as you edit the name and avatar. It also shows your theme color.
Teach it your content
Open the Training tab and add the pages, snippets or PDFs the agent should answer from. See Add knowledge for each option.
Publish it
Select Publish at the top right of the editor. The button turns into Live · Rev 1. Your agent still needs a place to appear: see Choose where your agent appears.
Test it
Before you put the agent in front of visitors, confirm that:
- On the Coach tab, the agent answers a question your buyers often ask.
- The answer uses facts from your brand description and the knowledge you added.
- When an answer misses, you've corrected it with the thumbs-down Coach button. See Preview and publish.
Troubleshooting
| Issue | What to check |
|---|---|
| The answer ignores your pages | Check the Training tab. Sources marked Queued or Indexing aren't ready yet. Wait until they show Ready. |
| A source shows Failed | Delete it and add it again. For a web page, check that it opens in a private browser window without a login. |
| The chat header says "AI Agent" | Role is blank in the Identity card. Fill it in. |
| The first message is blank | Write a Greeting on the Persona tab. |
Frequently asked questions
Can visitors see my agent as soon as I create it?
No. A new agent starts as a draft that only you can see. It reaches visitors once you publish it and deploy it to your site.
Do I need to save my changes?
Fields save when you click away from them. Visitors get those changes after you select Publish.
What should the brand description say?
Say what you do and who you serve, then what makes you different. Two or three plain sentences work best, because the agent reads this before anything else.